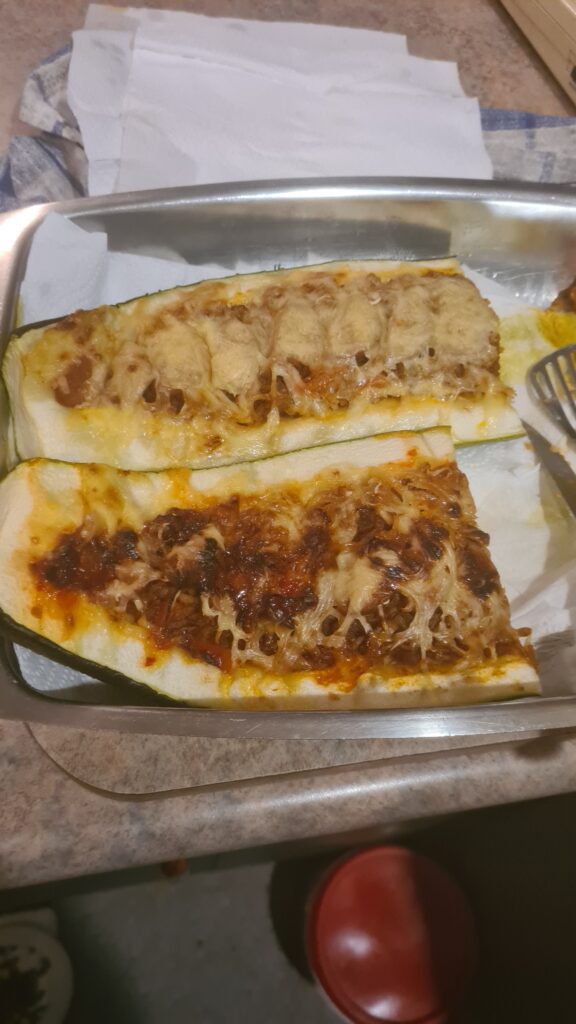
If you have ever tried to grow marrows, you know that sometimes they can get a little out of hand! Many people think that when they are this big that they are no good for eating, and more often than not it ends up in the pig pen!
I’m not one for waste, and I always love to experiment! So one day I realized that if you cut a marrow horizontally, then hollow it out, you can actually stuff it full of goodness! One of my favorite things to eat is PIZZA and while I know it’s not always good for you, I decided to try make one that was. It was a huge success and my family just LOVED it!

Ingredients:
Keep in mind the ratio of ingredients required depends on the size of your marrow! The below amount of ingredients was for a gigantic marrow! Adjust as needed. Here’s what you’ll need for the recipe:
- 1 x Giant Marrow
- 2 cups of Brown Rice (you can use white rice, but brown has more fiber!)
- 3 1/4 cups of water (or 2 3/4 cups of water if you are using white rice)
- 1 x diced onion
- 1 Tbsp of minced garlic (or 4 garlic cloves, crushed and minced to taste)
- 1 x 170g Pams Tomato Paste
- 1 x cube of beef stock
- 1 x diced capsicum
- Sliced and halved salami (the amount you use is personal preference as some find it hot and use less, others love HEAPS of salami)
- 1 1/2 cups of cheese
- Sweet Chilli Sauce for drizzling over top (optional)
- Dried Basil (optional)
- drained pineapple pieces (optional)
Method:
Keep in mind as with all recipes that it’s you and your family that has to eat it! If you don’t like your food being prepped a certain way or you don’t like a certain ingredient, never be afraid to change things up to suit you!
Step 1: Ready, Set, Rice!
If I’m brown rice I don’t usually wash the rice first, but I do if I’m using white rice! Give it a wash with a strainer until the water comes out clear. Pop it into a rice cooker with the water and let it do it’s thing! This step can be done ahead of time, the rice does not have to be hot.

Step 2: Preparing for the marrow!
Preheat the oven to 200 degrees Celsius. Wash your marrow and cut lengthways as evenly as possible. Grab a tablespoon and scoop out the soft center part of the marrow. (You can throw out the center, or you can place on non stick baking paper over top of a thin layer of cheese and bake at 180 c for 20 minutes or until golden to make some tasty snacks!)
Step 3: Fry as you might…
Put on your frying pan to medium high heat. (Hot Tip! If using stainless steel or cast iron, preheat the pan and put a small drop of water into the pan, if it runs across the surface like a tiny marble ball, your pan is primed for non stick! Take off the heat for a minute, then add your olive oil and butter (optional). The oil stops the butter from burning!)
Add your onions and garlic then fry until translucent and aromatic.
Add the tomato paste and crush the stock cube into a powder and sprinkle over top. Stir and let it come up to heat and begin to bubble. Turn down to a simmer. Add the capsicum and cook for a further 2 minutes. Stir into the tomato mixture as much or as little of the rice as you want, some prefer to have more rice and a thicker stuffing, others prefer to have less. Any leftover rice I have will go into the fridge to make stir fried rice the next day! Once it has warmed up, turn off and take the pan away from the heat. Mix in pineapple pieces. Taste test mixture and add any salt or pepper you think it needs.
Step 4: Stuffin’ it up!

Scoop the tomato rice mixture into the hollow of both halves of the marrow. Place sliced salami all along the top. Sprinkle cheese and dried basil over top and drizzle with sweet chili sauce (I only used sweet chili on one of the marrow halves because my nana doesn’t care for it, but I do!) Bake at 200c for 45 minutes. Poke the white part of the marrow to test for tenderness, if it’s hard then continue baking, if it’s soft then she’s ready to come out! Allow to sit for 10 minutes before serving.

Step 5: Enjoy!
I usually slice about 3 inch thick slices per serve, and it is enough to feed 4 adults and still have plenty leftover for my husband to take for his lunch the next day! It is just as delicious cold! I hope you enjoyed this recipe! Let me know how it went for you in the comments below and what changes you made for your family!


